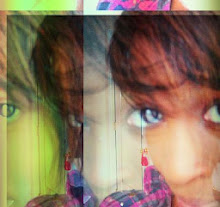
But I will show the before picture:
Everything is off about this!
First, get rid of the specs and lines that happen when printing and take out whatever that thing is sitting on the left side.
Then Color Balance. This is a nice straight to the point video.
One way that I color balanced this photo was to take the color out completely and make the photo black and white.
You can do that many ways.
- Adjustment layers>Hue/Saturation>bring saturation down to black and white.
- Adjustment layers>Black and White.
- Use Quick selection tool to select part that you want to add color to.
- Select Brush Tool
- Make sure the adjustment layer is selected.
- Brush the color back in.
Well I made a copy of the Saran Wrap Box and turned it into a new layer.
- Do Command + T or Crt + T to transform it.
- Rotate the box and grab a corner to make the box appear slanted to match it up with the original box.
- Turn down the opacity to make it look more natural.
Add brighter colors by masking in colors.
Mask in a brighter yellow.
I know, it's hard to explain without pictures. But here is the finished product.
My Grade: 55%
Uuggggghhhhhh! Sucks!


.jpg)


0 comments:
Post a Comment